I hope everyone had a great Valentines Day … and for some a wonderful 3 day weekend. I did. Want to know the best part? I had no kids yesterday! My folks took them & my honey was home … he did a bunch of stuff on his “honey-do” list & I got quite a bit accomplished around the house. It’s amazing how much more you can get done when kids aren’t around! 🙂 But I know … that’s know what you came here to find out … so I’ll get on with it!
I hope you’re not sick of headband stuff yet. I know lots of the other blogger’s have done “hair headbands” and I thought I was done with ideas on how to keep a “real” headband in place – that was until I got a FAB-tabulous little headband from this amaaaaazingly talented friend of mine. Because she wants to stay anonymous we’ll call her “Jen.”
Anyway – this one works nice for thinner headbands but will work with thick or thin I’m sure.
I didn’t take step by step pix on this either because the camera wasn’t anywhere near when I did her hair! So assuming you all know how to do a “pull through” it’s very simple & quick & easy.
Part the hair on the side (or wherever you want depending on if your headband has a design, bow, etc.) Then part it from your side part down to the top of the ear. Make a ponytail & then tuck it under & pull it through the hole. Make another part that is slightly behind the ear and repeat, making another pull through. Repeat on the other side of her head. I then flipped her hair up on the ends with our flat iron.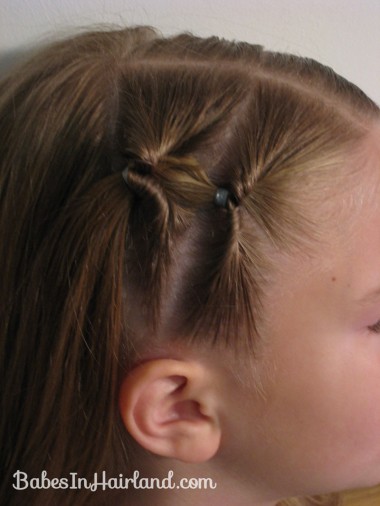
This is a darling hair do in and of itself, I think . . .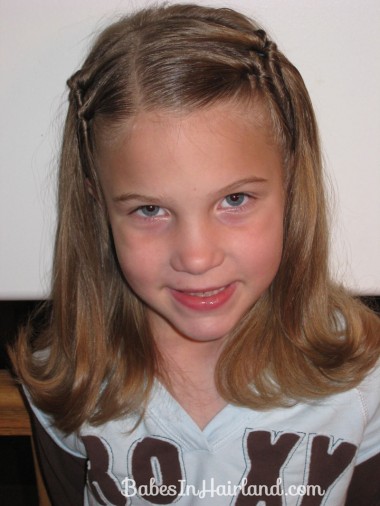
. . . but for an added splash of color we put in our cute new Mary Jane headband.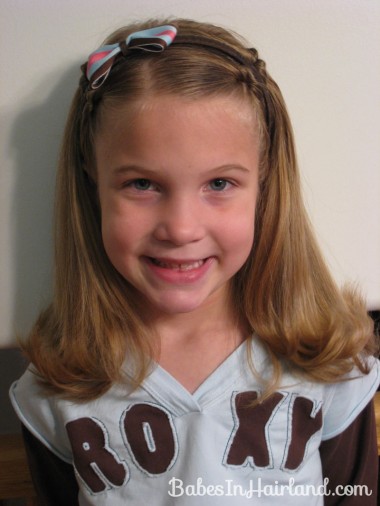
Just position it between the 2 pull through’s and it covers up that part that runs from ear to ear quite nicely. The pull through’s act as a “bumper” of sorts to keep the headband in place. You also could make the 1st set of pull through’s and then put on the headband and then do the 2nd set – so the hair crosses over the headband. I opted not to do that on this one because of the darling bow on top.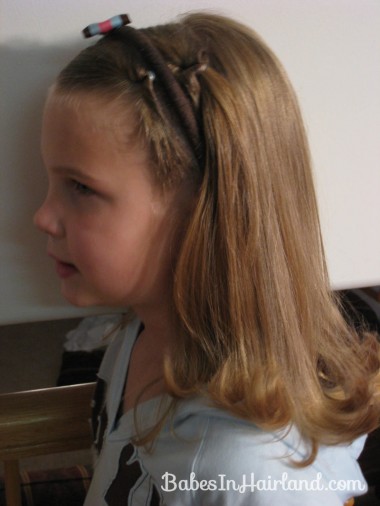
There you have it. Can I just say as a proud mama I just love this next picture of her! Anyway – this one is simple, quick & easy, and best of all soooo cute!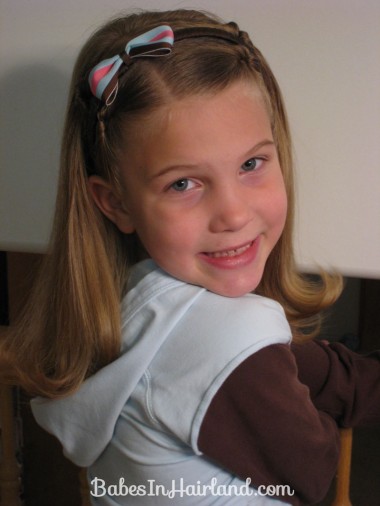
And if you’re fairly new to my blog or want other fun ideas of how to keep a headband in place – check out these other posts I’ve done … go here, here, or here. You’ll never have to complain about a headband not staying in place again!
super cute!! How old is Goose now?