I’m not so sure what to call this one, especially since it’s not my own idea. This came from one of my readers – Christine. She sent this to me back after Thanksgiving when I’d done this hairdo. She said her DD’s hair wasn’t quite long enough to do anything like the bun, so she was inspired to come up with this instead. And – was kind enough to share it and is letting me share it with you guys. So if anyone has a name we can give this one – please send it my way!
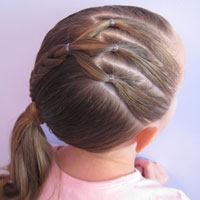
So – here is the hairdo Christine sent me (her little girl has bangs, so this works just great with or without them): Here’s Goose –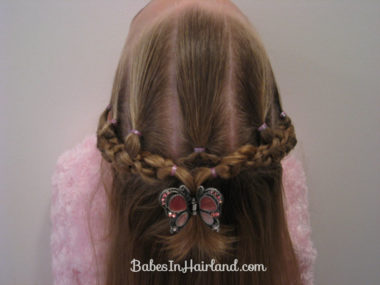
Here’s her little DD. As you can see, she’s got bangs up front that she didn’t include in this part of the hairdo.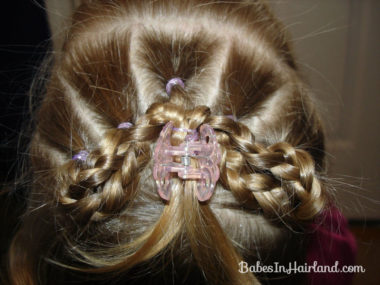
So – here’s how she did it:
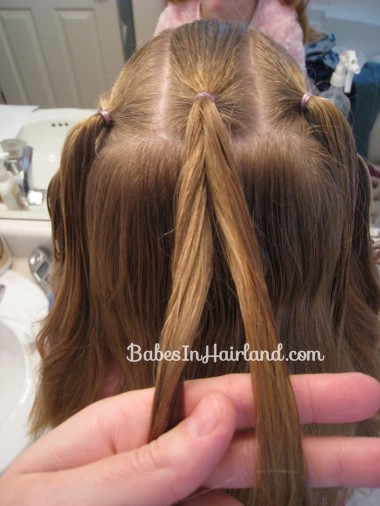
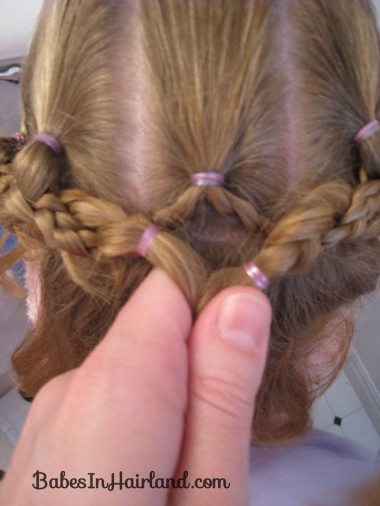
Start by making 7 little pony’s across the crown of the head. I started with 1 dead center and then made 3 on each side of the head working down towards the ear. (You can only see 5 only see 5 of the 7 in this picture – there are 2 more on the right side of her head.)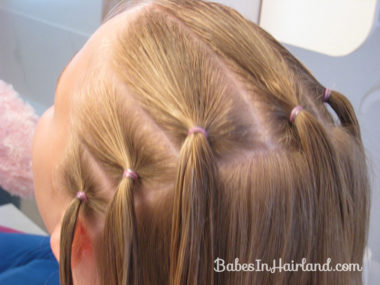
Then divide the middle ponytail in half.
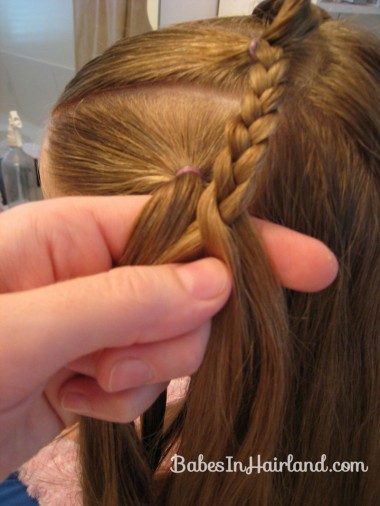
Take the left side of the middle ponytail and start making a regular braid – braiding down towards the next ponytail.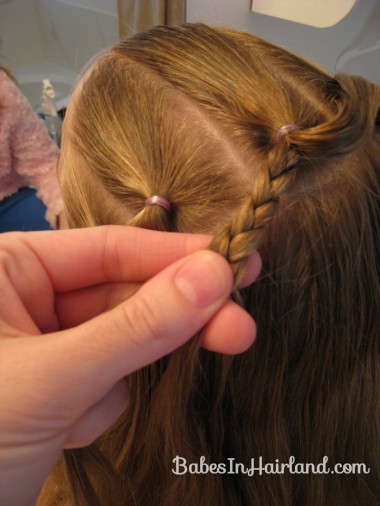
Once you get to the next ponytail, add the entire ponytail into the closest strand of the braid & incorporate it into your braid.
You’ll have 1 thicker strand of hair in your braid at the moment. I didn’t get these pulled as tight as I’d of liked, but hopefully you get the idea. 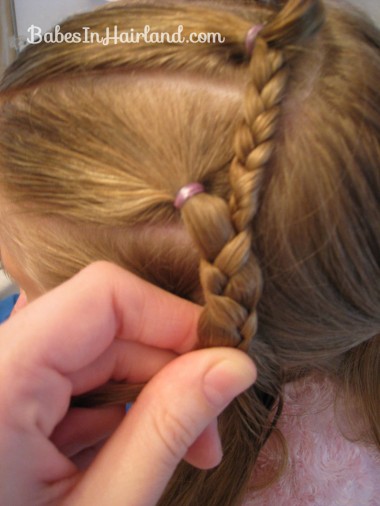
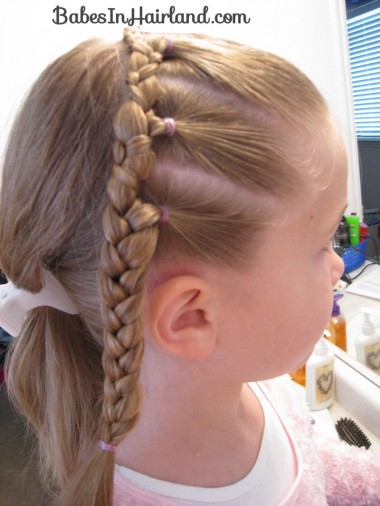
Continue braiding down towards the ear, and when you reach the next ponies do the same thing. And like I said, I didn’t get these pulled as closely to the rubberband as I’d of liked.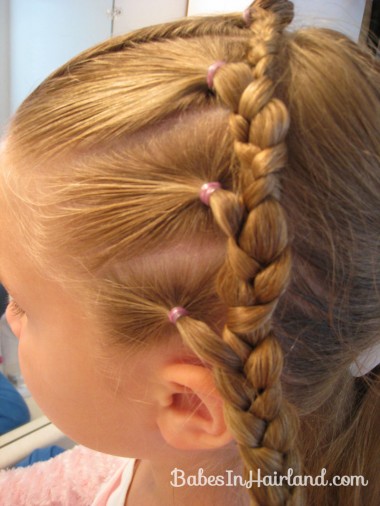
On the right side of her head though, I did get it pulled tighter but my braiding wasn’t the greatest at this point because Bee was at my knees giving me grief! Once you get done incorporating the last ponytail into the braid, continue on down and braid down a bit further – leaving hair free at the end & tie it off with a rubberband.
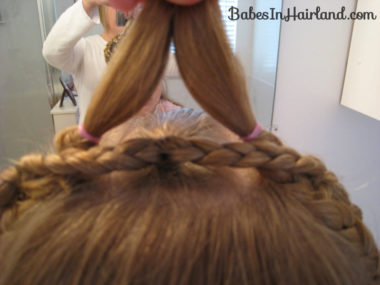
Once you’ve tied it off with a rubberband, bring the end of your braid back up towards the top center of the head where the middle ponytail is.
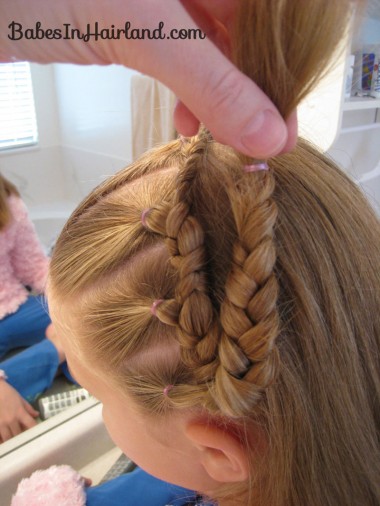
Now this is where it’s kind of hard to explain – although the process is not difficult at all. Take the end of your braid that is tied off with a rubberband and pass it back up underneath the skinny braid that you started branching off the very middle ponytail. This next pic is out of sequence, but I wanted you to see how it should look from above before you pull the braid back up. But those braids branching off the center ponytail are what you will pass the end of your finished braid underneath.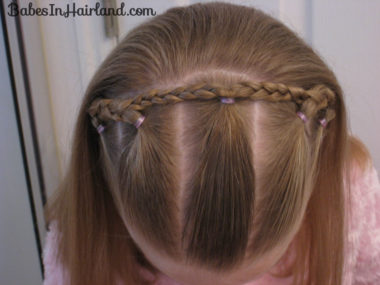
So pull it forward towards the front of her face.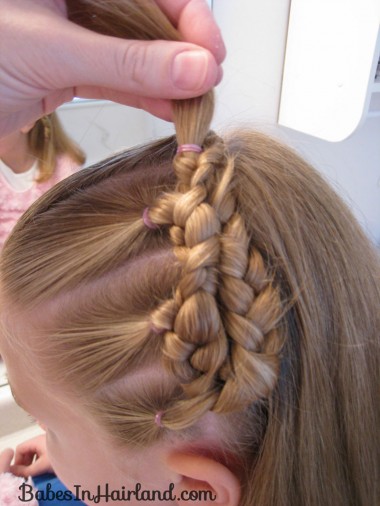
Do the same to the left side – maybe you can see it better in this picture. Ignore my lovely arm and half my body in this shot!
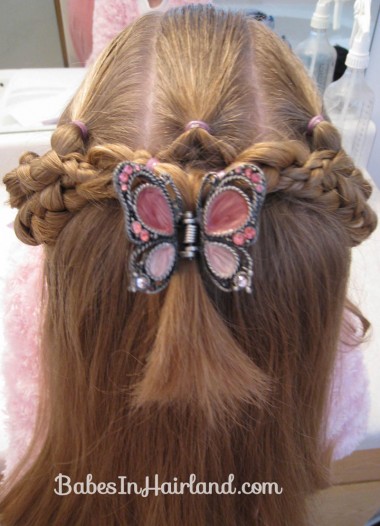
Then once you’ve put them underneath that center skinny braid pull them back towards you.
And fasten together with a claw clip of your liking. This lovely butterfly clip is one of the things the girls “gave me” for Christmas — only to be used in their hair of course! 🙂 Once I had it fastened with the butterfly I sprayed the ends that were sticking out and used my flat iron on them to turn the ends up just a little.
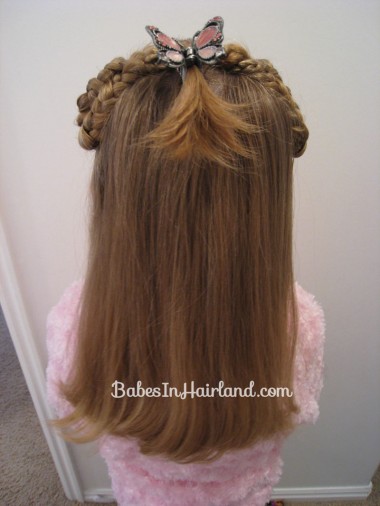
Here’s a view from the side. I’m thinking the butterfly might have been just a wee bit too big, but it sure looked pretty from the top!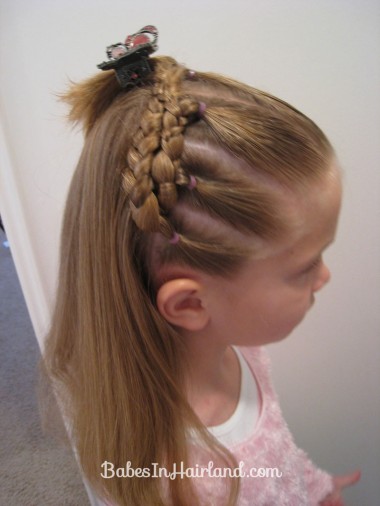
Here’s a view from the top of Christine’s DD’s head.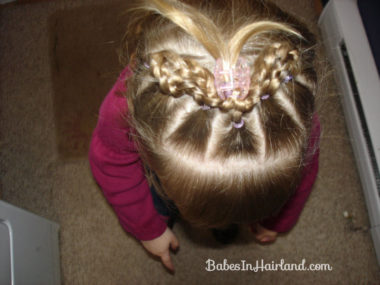 And one of Goose. Obviously her head is a bit bigger so everything is spread out and spaced a bit differently. But I still loved how it all turned out.
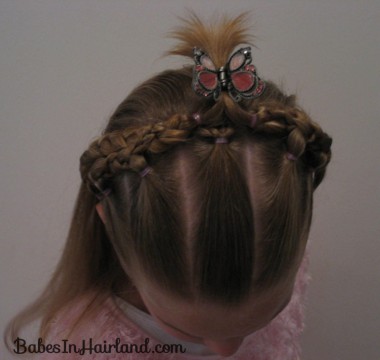
I wasn’t sure if I liked seeing the butterfly wings stick above her head (this probably would have been less visable if she had bangs or the clip was a bit smaller) but Goose was totally loving the look of having a butterfly perched on the top of her head!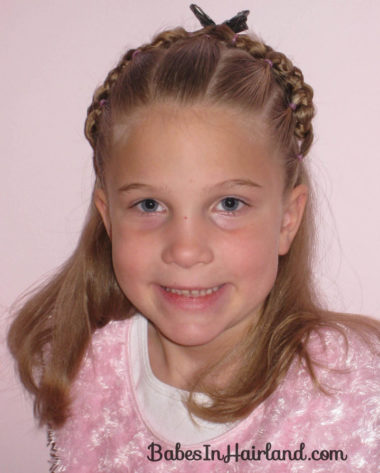
And here’s the front shot of Christine’s absolutely darling little girl. Isn’t she just the sweetest?!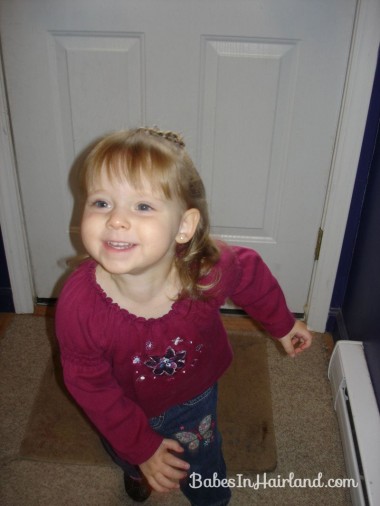
Anyway, there you have it. Thank you again Christine for sending this fun hairdo to me. I hope I explained it right & did justice to it. The best part is I came up with a very slight alteration to this, that I’ll post tomorrow. There’s really only 1 difference from this hairdo, but it is totally cute as well. So look for that tomorrow.
