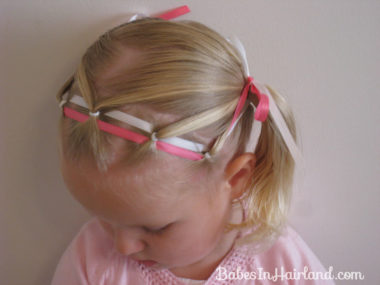
 I’ve been on a kick lately with ribbon, so I hope you don’t mind. This could be done on any age and probably if your DD is older you could use thicker/wider ribbon. If you’ve been around long enough, you know that I hadn’t been a fan of headbands until I came up with my favorite trick of all time – The Dressed Up Headband. Since then I’ve seen a lot of different versions out there on other hair blogs – doing the criss-crossed or twisty hair across ribbon, headbands, etc. I’ve never really messed too much with headbands on Bee, and since her head is still a little small I know they’d drive her nuts for too long of a time. So this is what I came up with to give her still a bit of a headband look without the annoyance of a true headband.
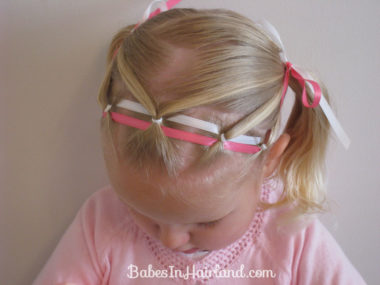
Part the hair just a bit in front of the ear & part clear across to the other side of the head in front of the ear. You can make your part further back if you like, but I wanted very small amounts of hair so I parted a bit in front of the ear. I made 5 ponies. Three would also work. You want an odd # though. Secure them all with rubber bands.
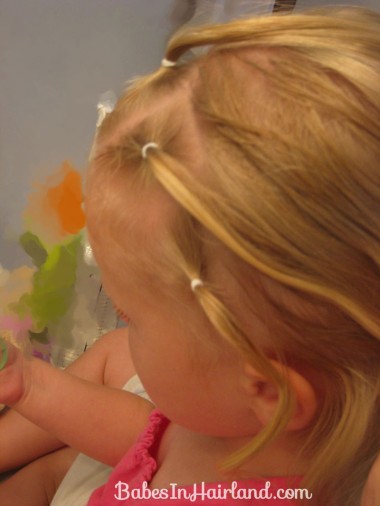
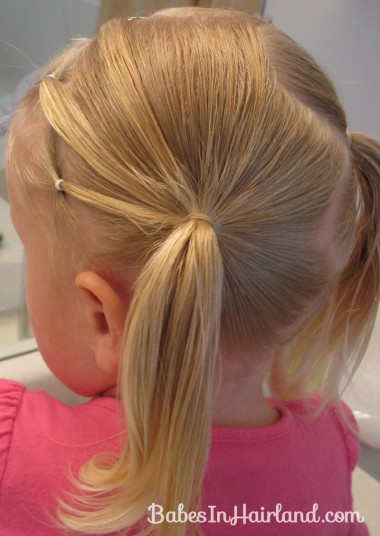
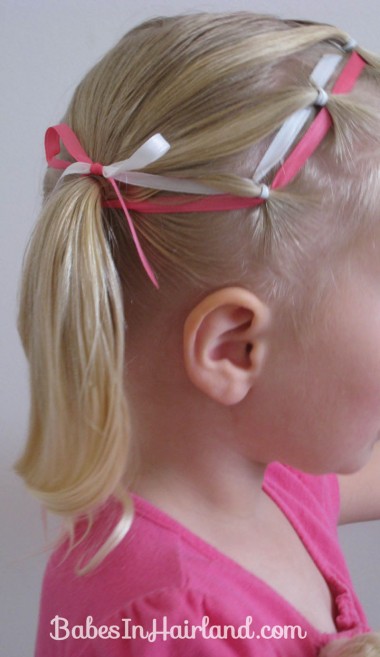
From the side – you can see 3 of the ponies. The top middle one and the two on the side.
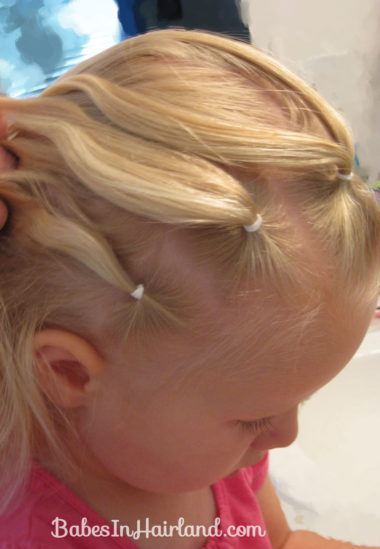
Divide the top middle pony into 2 sections.
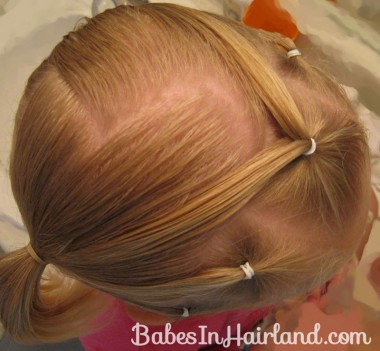
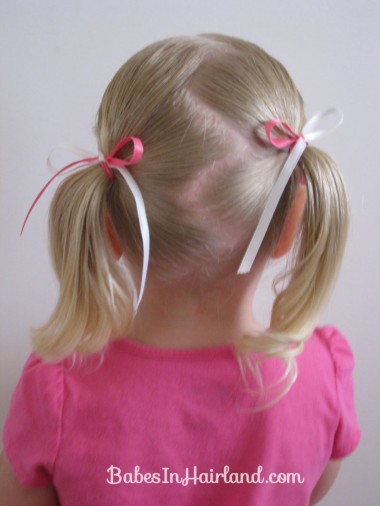
Now, part the hair that is hanging down in back down the middle of the head to form 2 pig tails. I did a zig-zag part. Take 1/2 of the hair from the front middle mini-pony, and then the other 2 mini-ponies from front and add them into your pig tail. Secure with a rubber band like as shown in the picture. Hopefully you can see the 3 sections of hair from the front min-ponies that I added to the pig tail.
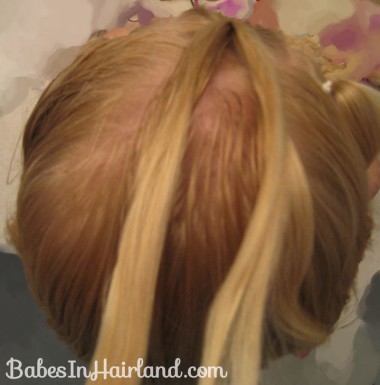
Repeat to the other side. This is a view from the top where I’ve split that top middle mini-pony in half. You want your part down the middle of the back of her head to be in there!
Now you certainly could stop here and have a darling hairdo. But no – not me – nope! I took it a step further!
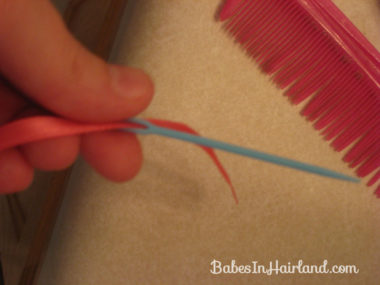
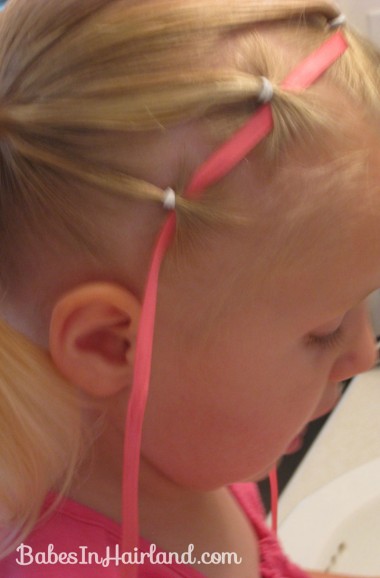
Grab your trusty child friendly needle & thread a piece of ribbon through the eye. You can pre-cut your ribbon if you like by draping it across the front of her head & guesstimating how much you’ll need, or I just left it on the spool until I thought I had what I needed & then I cut it.
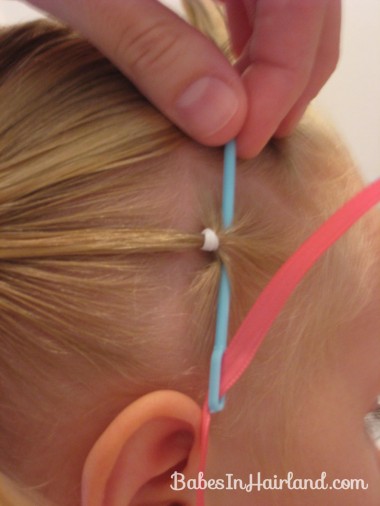
Thread the needle through a little bit of hair in front of the rubber band.
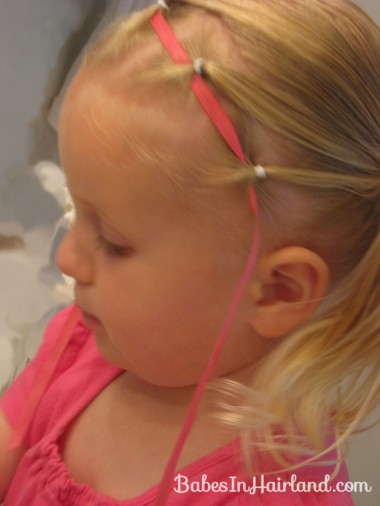
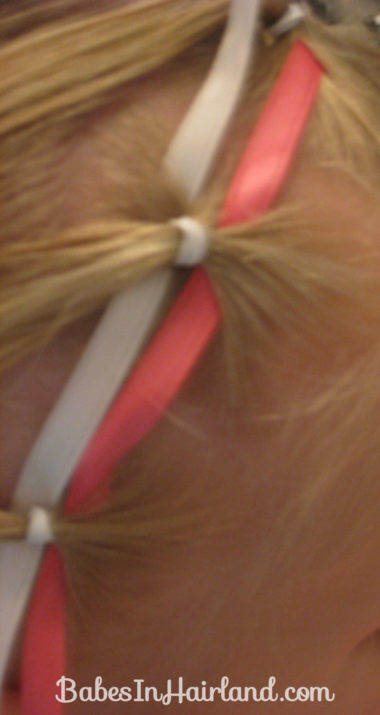
Sorry a few of these are blurry again. She had ants in her pants I think! Pass the needle through the hair in front of each of the rubber bands going from ear to ear, leaving a long enough tail to eventually pull it back towards the pig tails.
Then I took a 2nd color of ribbon and passed it behind the rubber band which makes it go underneath those mini-ponies. Again, be sure to leave a long enough tail on each side that you can pull it back to the pig tails on each side.
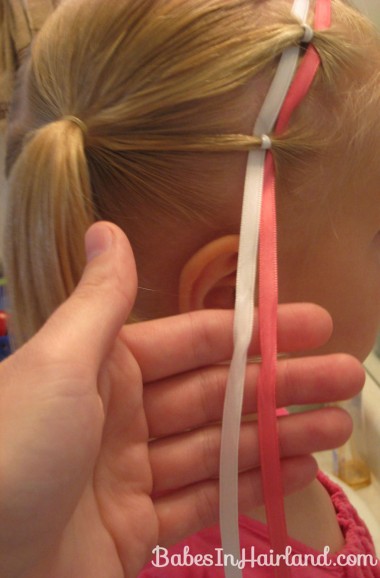
Once you’ve got the ribbons laced from ear to ear take the remaining ribbon …
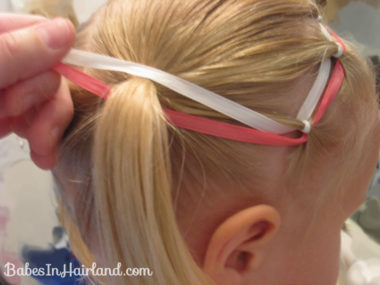
and pull it back towards the pigtail. Pass the ribbon that is behind the mini-ponytail rubber bands over the top of the pigtail (in this case it is my white ribbon) and the ribbon that is in front of the mini-ponytails underneath the pig tail.
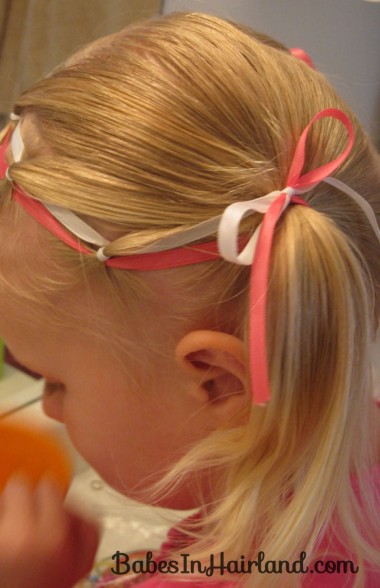
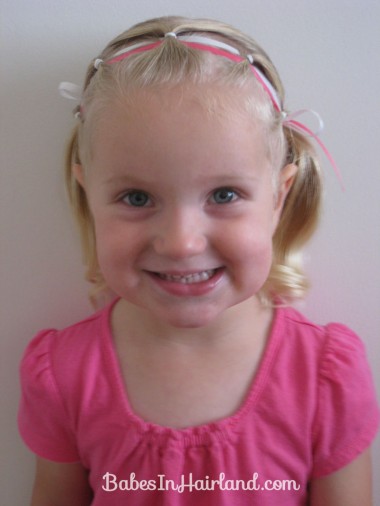
Gently secure it around the pigtail rubber band and tie a bow. (If you pull too hard & tight you’ll be pulling ribbon out from the other side making it all uneven.) Each half of the bow will be a different color! When I do this again, I’m going to cut a longer piece of ribbon so I can wrap it a few times around the base of the pig tails because towards the end of the day, they started slipping off the pig tail. Also, it would have been nice to have a longer piece of ribbon hanging down with the hair in her pig tail.
Repeat to the other side, making sure that the color of ribbon is in the same position on each of your bows. Here’s a view from the back so you can see how I made the loops of the bows end out pink in the back and white loops in front.
When I got done doing this, Bee looked in the mirror and with a big smile said, “Pin-sess Hair Mommy! Pin-sess Hair!” It was a hit — so much that I did it 2 days in a row (as you probably have noticed she’s wearing 2 different outfits depending on the picture!) Best part was I didn’t have to redo the ponies in front – just redid the pig tails and ribbon.
So there you have it – Pin-Sess Hair for your little girl. 🙂
I absolutely LOVE this look! I am a complete newbie to doing anything interesting with my 3 year old’s hair, and have been looking for something relatively simple to try. This one is so cute and looks like one I might actually be able to do! 🙂
I’m glad you love this one! It was so cute back when we did it, I’d sort of forgotten about it — I just might have to do it again for church on Sunday!
Tried n tested turned out great thank you again..
Yay! This is probably one of my favorite ones from her as a little girl! It’s so cute & versatile!