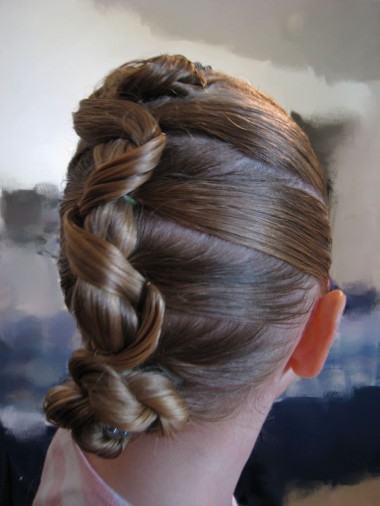
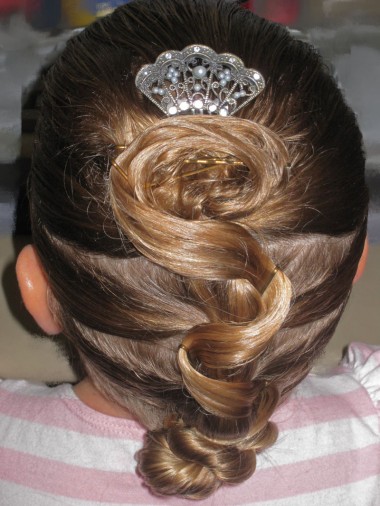
Ok – so I first need to say that this post would have been up about 10 hours ago (during Bee’s nap) except we had a MAJOR freak storm here and it hailed and poured buckets. Trampolines jumped fences, trees were uprooted, just crazy stuff. I had water coming my back sliding door and countless of my neighbor’s basements flooded with several feet of water, so needless to say, it’s been chaos in my neighborhood and my efforts were directed elsewhere.
Anyway, that’s not what you came here to see, but I was all excited to get this posted but Mother Nature had other ideas for my day! This hairstyle I saw in a book a long time ago that I’d checked out from the library. So on with the show…
For this hairstyle you will need:
5-7 rubber bands, plenty of bobby pins, a couple rat tail combs (if you have them – you’ll see why in a minute), and if you want any other hair accessories to accent your finished product. Oh, and of course water to keep those fly aways down and some hairspray.
Step 1 – Section the top portion of hair up –
Part the hair from about the top of the temple clear around to the other side of the head and just put it in a clip or something to hold it out of the way.
Now depending on how much hair and the size of your DD’s head will determine how many sections you can make. We had enough room for 5 ponytails plus the top of the head.
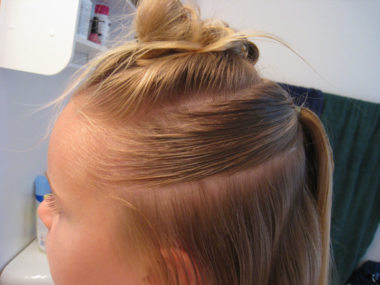
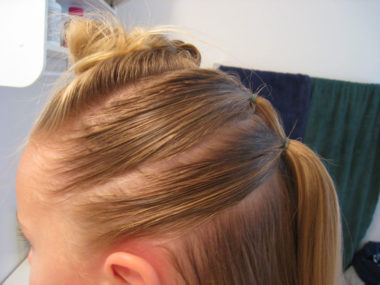
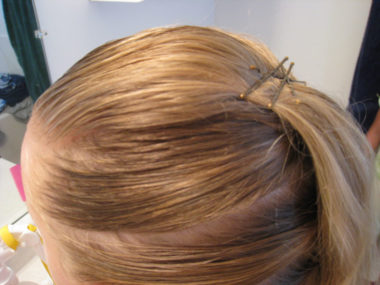
Step 2 – Part the next section of hair (shown below). Fasten it with a rubber band in the back like a regular ponytail.
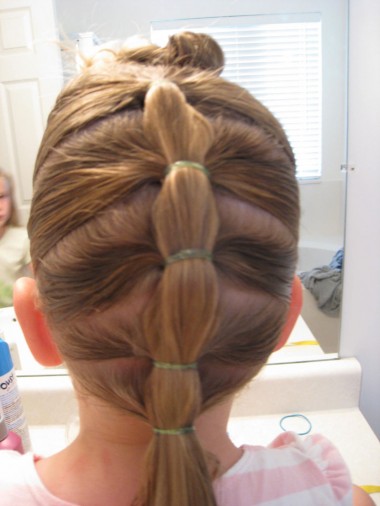
I would suggest using the little thin rubber bands so they aren’t seen (and ones that are clear! Bug chose green ones and since her hair isn’t overly thick you can see them in some of the pictures! Oops!)
Step 3 – Continue on down the head making ponytail’s until you reach the nape of the neck.
Leave the hair hanging down there for the time being. We’ll come back to that. Try get the ponytail’s straight down the back of the head – looks like I didn’t do so hot in that department!
Step 4 – Secure hair from front on top with bobby pins
Then take the hair that you had tied off on the top of the head and pull it back. You can tease it a bit, and smooth it, if you don’t want it pulled straight back. Either way, fasten it down with several bobby pins so it is firmly fastened to the head.
Step 5
Divide the hair that is hanging below the bobby pins into 2 sections.
Step 6 – Snake the right section over the bobby pins then join it with left section.
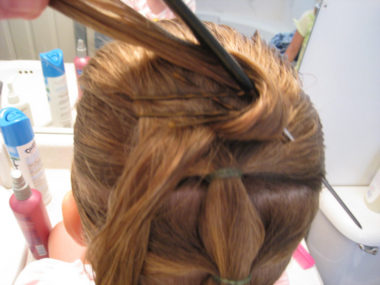
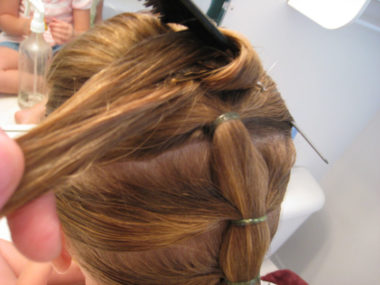
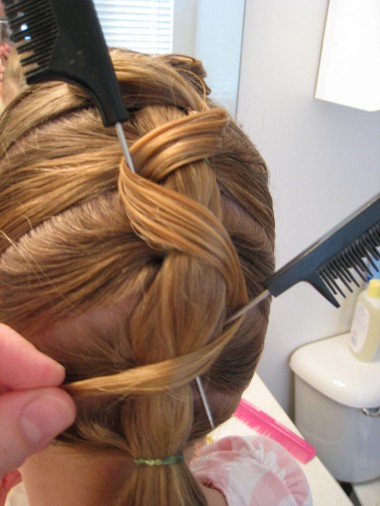
Take the right section and loop it around a rat tail comb towards the left (or you can probably just hold it and bobby pin it in place) — I was trying to think of other poky things you could safely stick through their hair and I guess if you have any kabob skewers they might work! I don’t know – I just found it easier with the combs I have. You’ll want to be sure the hair is a bit damp to get the hair to lay nice and smooth.
Anyway, wrap it towards the left so it can join the left section of hair that is still hanging down. If you can tell that’s what I’ve done in this picture below.
Step 7 – “Snake” the hair from on top over rubber bands
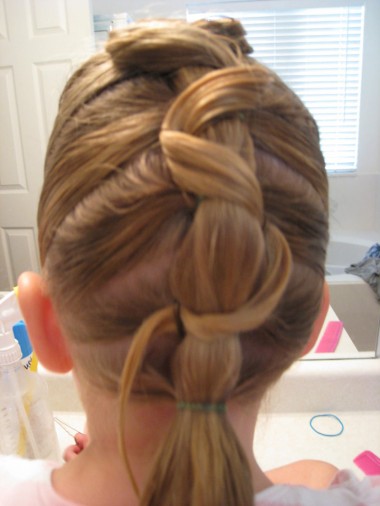
Now that the hair is back into 1 section you are going to snake it down kind of like an “S” down the ponytail’s covering the rubber bands. I forgot to take a picture of it, but you need to fasten the hair on the left side too up there on the top of the head before you start your trip down back of the hair!
So what I did was stick both rat tail combs into the hair where I wanted to eventually stick a bobby pin. Then I looped the hair around the rat tail comb. One bobby pin did the trick for each spot until I reached the bottom.
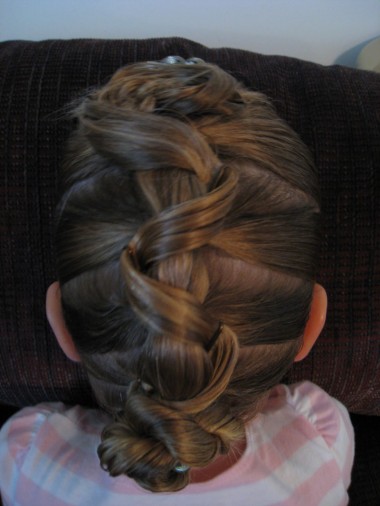
I didn’t get things wrapped quite as neat and tight up on top like I’d hoped, so we sort of ran out of hair for the last rubber band. I did wrap it but had a hard time keeping it fastened down. But no problem because it was covered with the rest of the ponytail that was hanging down. Don’t be intimidated by the whole rat tail comb thing, it really isn’t that complex. It just helps position the hair where you want it until you can pin it down.
Optional Step 8 – Make chignon/bun with remaining hair at the bottom
At this point, you can do pretty much whatever you like with the ponytail hanging down at the bottom. If you have enough hair to wrap around the bobbypin, fasten it underneath as I’ve shown here. You could then curl the ponytail beautifully, or as I did, I did a corkscrew twist with the remaining hair and pulled it up into a bun. You could even twist it and totally tuck it up underneath as you’ve probably seen done with French braids.
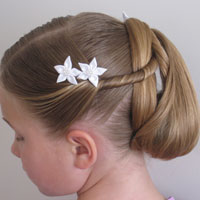
When I do this again, I won’t put as many bobby pins up on top because you can see them through the middle of the top loop. If you want to really dress it up you could use bobbypins with jewels on the end or something to add some “bling” to the ‘do. So there you have it. Hopefully it makes sense. If not, please let me know and I’ll try explain it better.
