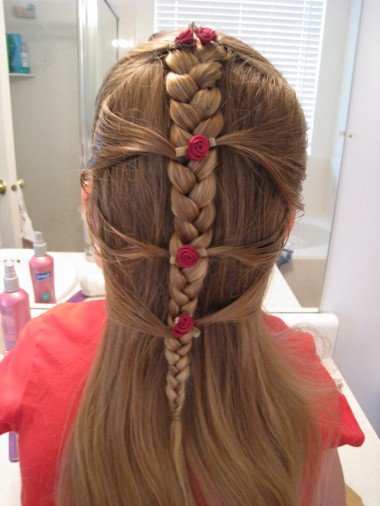
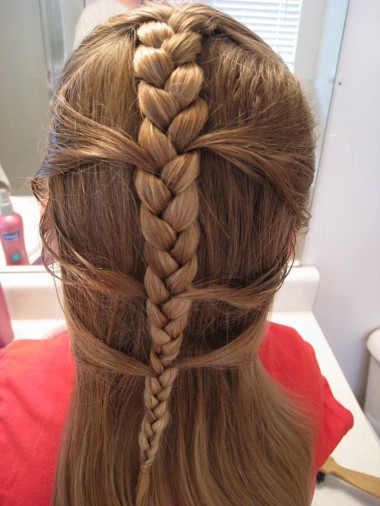
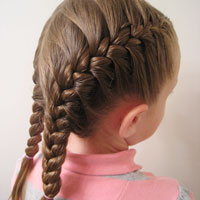
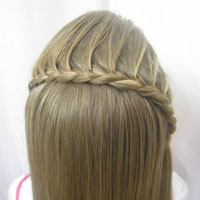
I’m not sure what to call this one, but there is a little bit of French braid to it as you can see by the added pieces from the sides. For those of you who maybe struggle with the French braid and feel like you need 4 hands to do it (as I felt for a long time!), maybe you could give this a try for starters, and work up from here.
Just by looking at the picture, it’s probably self explanatory, but for the rest of you, here’s how I did it!
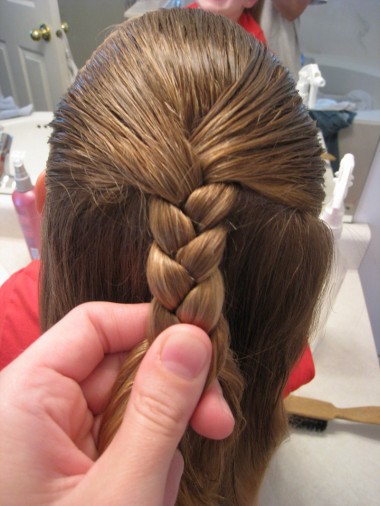
Step 1 – Part hair from ear to ear and start braiding
To begin with, section off the top half of the hair starting from the ears. Then begin a basic 3 strand braid. Depending on how long the hair you’re working with will determine how many pieced in sections you’ll want to add.
Step 2 – Add small sections to main braid
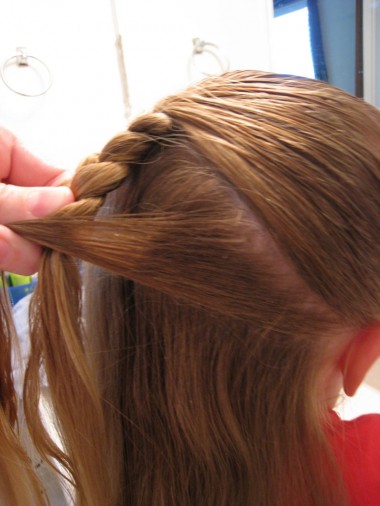
After you’ve braided down an inch or two, pull a small section from the right side of the head – just from the hair line below the part (as you can see in the picture you will leave hair hanging down under the hair you are pulling up). In a French braid, you’d pull all the hair from this section up with it, but for this style, you just grab a small amount right at the hair line.
Step 3 – Repeat steps adding hair into main braid
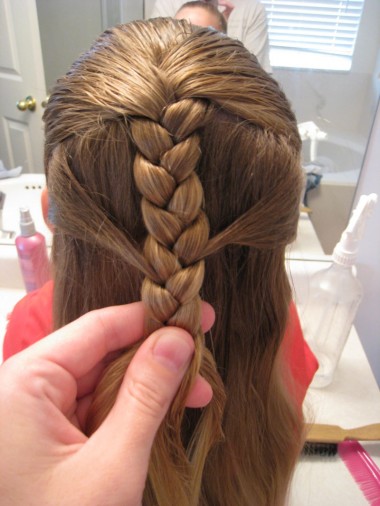
Repeat the procedure on the left side pulling just a thin amount. The trick is to keep the basic braid close to the head so when you put the braid down, those added sections aren’t way loose and bubbly. Also be careful not to get it too tight or it will pull the hair hanging down underneath in a funny fashion. Does that make sense? Make sure you keep the hair hanging down combed smooth, because it’s rather difficult to go back and smooth it out once you’ve got all your added hair in. So here is the first set of add-ins.
Step 4 – Continue adding hair and secure braid at the bottom.
Then continue the basic braid once again until you are ready to add in another section of hair from both sides. With the curve of Bug’s head it looks like I didn’t space these evenly, but they are! I probably could have done one more set of add-ins, but I like the odd number look better.
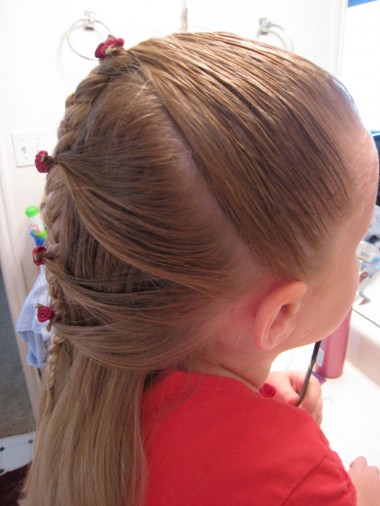
The middle section add-in’s on this didn’t work so well, but hey, I never claimed to be perfect, right?! So, tie it off with whatever you normally tie braids off with. I prefer the tiny clear rubber bands for this. Then I added a few rosettes that I’d made a while back to add some color. Those little roses can be bought at any craft store in just about any color, and I just sewed them onto the top of bobby pins. They are great for sticking in the girls hair on just about any braid or updo.
Optional Step 5 – Add flowers or other accessories
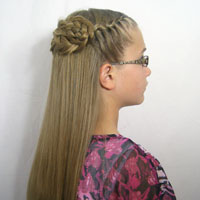
Here’s a view from the side, so you can see how thin and small the sections I added in were. Hope this made sense for you, and happy hair styling!
