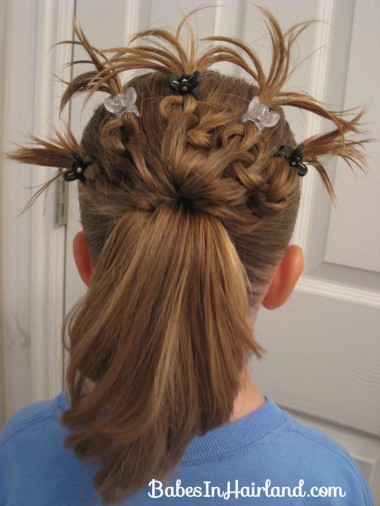
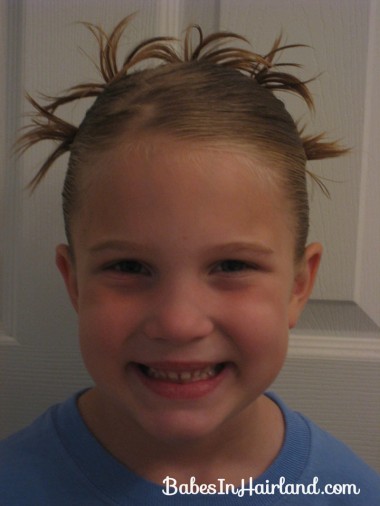
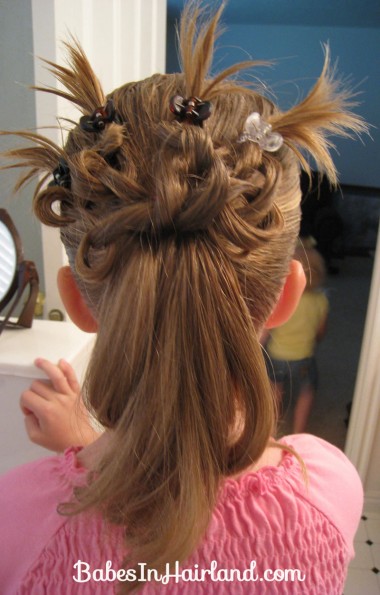
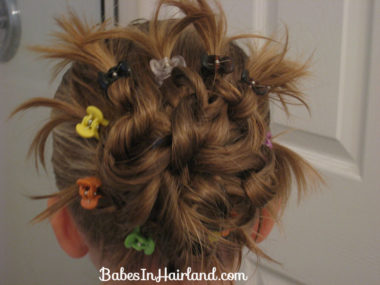
Before all the lovely drama happened here in Hairland, I’d been playing with a fun new idea on Goose’s hair. She kind of decided on the silly name, do to way she looked from the front with the hair poking up above her head and from the back she thought it looked like the tail of a peacock that is spread out – with a bit of spunk! (minus the colorfulness of course!)
We are extremely happy that her hair is finally long enough to pull up into a ponytail again. Since cutting more than a foot off in May, it’s seemed like a long time since we’ve been able to pull it back into a regular old ponytail and have all the hair stay pulled back. But on the day I started this idea we had a bit more time to do something more than just a ponytail (yes, we do have “just ponytail days” too!)
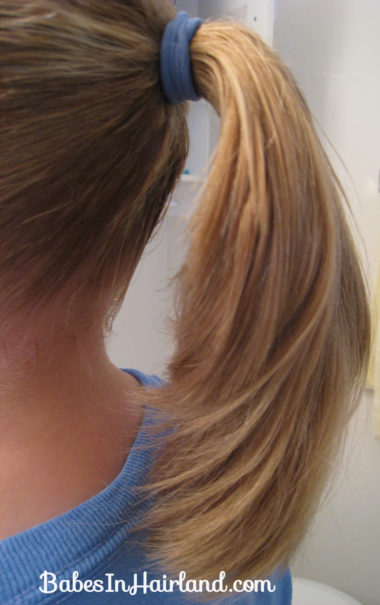
I just wanted you to see a view of her ponytail to see the different lengths of hair she’s got in it. In fact, I think it worked very well because of that, as I was able to arrange the sections of hair accordingly. The shorter sides I pulled up to the left or right of the pony, and the middle of the ponytail that is longer, I stretched up a bit higher to poke up a bit more above her head.
So, I parted her hair sort of zig zagish since this was going to be a fun playful style. Then begin with a basic ponytail – centered in the back of the head – if not a bit higher (if you want the hair to peek up above the head & show from the front.)
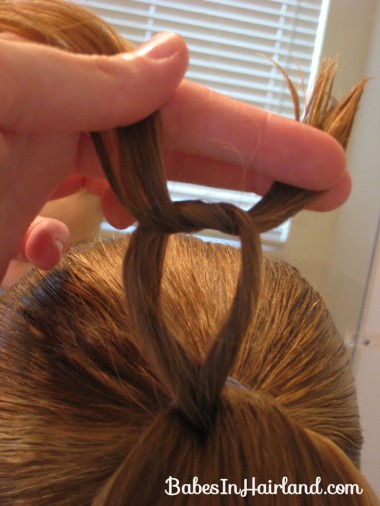
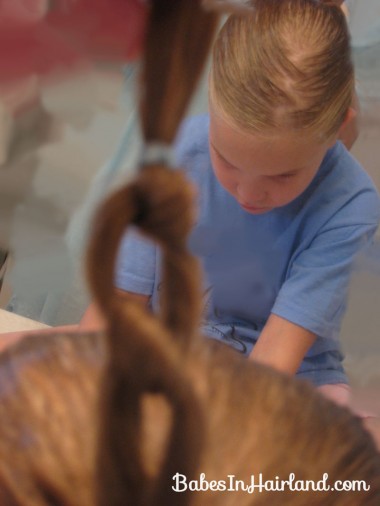
Then take small sections and divide like this making the beginning of a knot. Make sure the hair is plenty damp to prevent fly aways. I take right over left. This is the same technique I used for this hairdo but instead of putting multiple loops in each section of hair and snaking them all over the place, I only did 2 and anchored them right above where I was working.
Repeat again to make a second loop – you can do right over left again if you wish since it’s not being pulled tight into a knot like on the baby square knots I posted recently. The first time I did this I didn’t fasten the end with a rubber band and it did hold pretty well, but since then, after I’ve made 2 loops, I’ve fastened them with rubber bands because the clips do grip better and stay put longer.
I repeated the above steps to 5 different sections of hair just moving from left to right on her ponytail. I did all 5 of the loops first, tying them off with rubber bands and then secured them with the clips afterwards. That way I could position them evenly around on her head symmetrically. Once I had them positioned where I wanted them, I sprayed the poking up ends with hairspray and kind of seperated them to give them some stiffness so they’d stay sticking up rather than start drooping once they dried.
Here’s a view looking straight on the back – This day I only did 4 sections and I got it a bit lopsided! It all should of been shifted to the right a bit . That’s probably why I like the 5 sections the best.
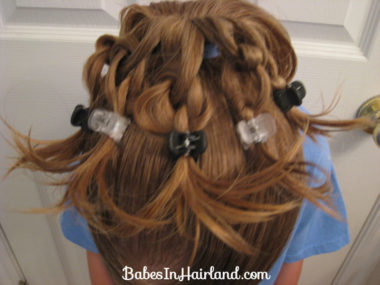
This is from the front top looking down on her head. Sorry this is a bit blurry.
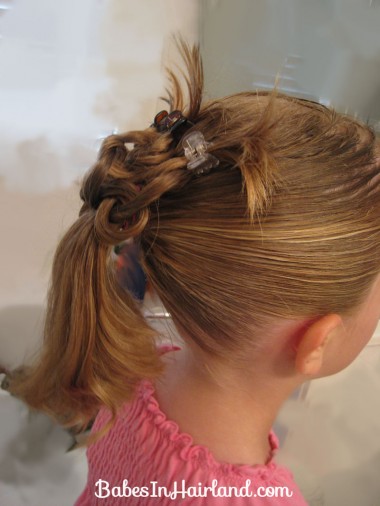
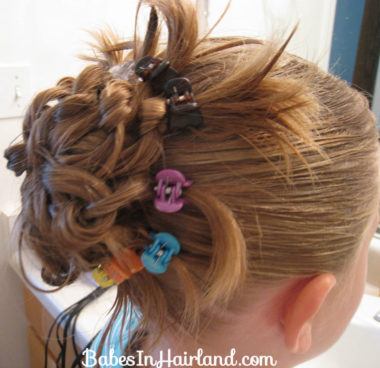
And here’s a view from the side
Then one day I had a little more time & she wasn’t going anywhere, so we kept going, using all the hair in the ponytail. And yes, I know, the clips aren’t at all the same color! Chalk it up to having probably 1 of every color clip break at some point since we’ve had them, so now I have one of every color in the rainbow! Neat! I had started on the top w/my black and clear ones, and then Goose randomly handed me color after color and this is what we got. Kinda cute too, but I think I like just a few up on top the best. So here is the Peacock Tail – bun version!
Here’s a side view of the entire pony being done – obviously it’d be better with matching clips, but you get the idea.
So as you can see, there are several different things you can do with this fun one. I like it cuz it’s a bit playful and can be done on just about any age girl as well as any thickness of hair. You can use baby clips on fine baby hair and do as many sections as you want. You also could curl the ends that are spraying out to give them a daintier look.
