")
") I’ve got to say that Hair 4 My Princess & I have been ironically on the same wave length or something lately with hairstyles …. so if this looks sort of familiar, it’s because she did something similar a bit ago for one of her Easter do’s! This one just has a few less steps.
I’ve got to say that Hair 4 My Princess & I have been ironically on the same wave length or something lately with hairstyles …. so if this looks sort of familiar, it’s because she did something similar a bit ago for one of her Easter do’s! This one just has a few less steps.
Start by section out the middle part of the hair & making a pony. (You could part the hair from ear to ear & make 3 sections into ponytails – but this is how I started mine!)")
Make the ponytail high enough that you can tuck the hair underneath the rubber band for a pull through. Check out our video HERE if you don’t have a Topsy Tail to make these.")
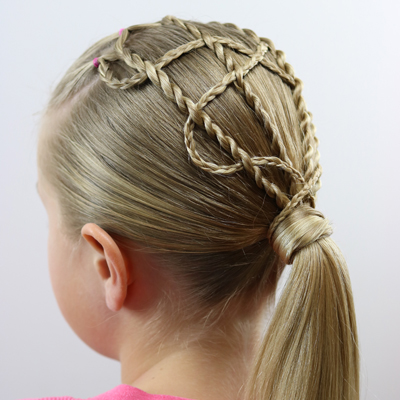
Then make a pony on either side of the middle one and make pull throughs on them too. (So you’ve got 3 pull throughs total – across the head.) ")
Then divide the middle ponytail into 2 sections.") Take the right section on hair from the middle pull through & pull it towards the right side of the head to join with the pull through you’ve made on the right side of her head.
Take the right section on hair from the middle pull through & pull it towards the right side of the head to join with the pull through you’ve made on the right side of her head.")
Start twisting both strands and make a rope/twist braid. If you need a refresher on rope/twist braids you can watch my video HERE . So you’re combining the 2 strands of hair to make 1 rope/twist braid. Tie it off with a rubberband once you get down as far as you can.")
Repeat on the other side. Pulling the left section over to join the left pull through — to make a 2nd rope/twist braid. Tie it off with a rubberband once you reach the bottom of the hair.")
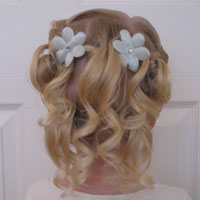
I then combined the hair she’d had hanging down into a ponytail. Then I added the 2 rope/twist braids and used another rubberband to secure them underneath the ponytail.")
Then I added a darling bow that my friend made for me …. you know the one … the one who says she doesn’t know how to make bows, wants to stay anonymous, but whom we are calling “Jen!”")
But wait … there’s more!
Were you wondering if I’d changed the color of Goose’s hair? Nope. My darling niece, Miss Libby, with her amazing red hair, came with her family and stayed with us — so we had to get her in on the action. So if you want to add some extra fanciness to this hairdo – & make it extra princess-ish, you can add this next step.
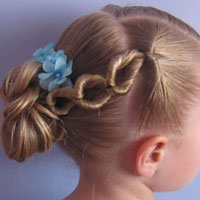
She’s got some lovely natural curl in her hair, so I pulled her ponytail into a messy bun, and the ends just curl nicely out from under it without any help.")
Then I took ribbon – with a safety pin on one end. And pulled it through the 2 single strands of twists at the top of the “V” of hair.")
Then I started the “corset crisscross” as I like to call it. You just kind of have to eyeball it. Start with the one side like you’re lacing a shoe ….")
Then go and finish the criss cross off on the otherside.") Once I reached the ponytail or bun, I wrapped the ribbon around the base of the ponytail a couple times to cover the rubberband and tied it in a knot.
Once I reached the ponytail or bun, I wrapped the ribbon around the base of the ponytail a couple times to cover the rubberband and tied it in a knot.")
Then I tied a little bow to finish it off. I tried different bows or flowers, but they all covered the criss cross look – so I left it with a simple bow from the original ribbon.")
A view from the side.")
And one happy little niece. Who can ask for more!? Thanks Libbers for letting me play with your hair! ")