 I’ve had people ask me where I get my “inspiration” (if you will!) from. Well … silly enough, this idea stemmed from one of the cutsie little embellishments I have here on my blog:
![]()
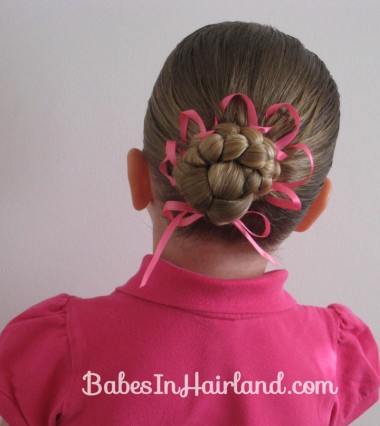
One day when I was messing around in Photo Shop with the above flower, I happened to look at the button in the middle & the little ribbon coming out of the middle of it & in my head I suddenly saw a head of hair — with a bun w/a ribbon sort of laced around it forming a flower. So – I don’t know if I’d call it inspiration & it’s not like this ‘do really resembles my blog flower – but either way — this is where I came up with my idea! 🙂
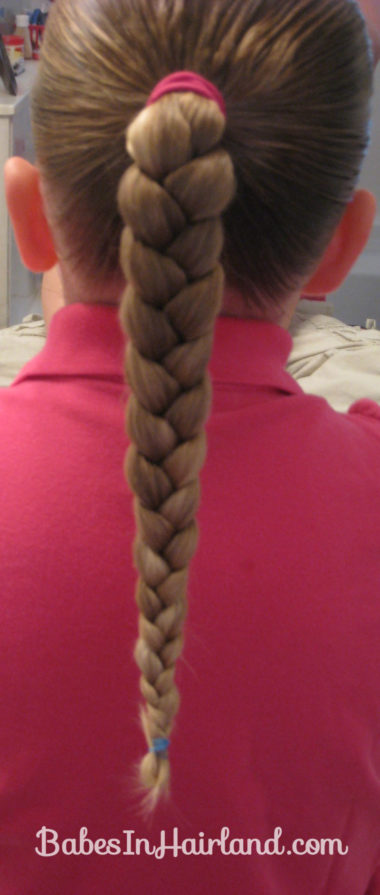
We were working w/some *cough*dirty*cough* hair this day so it was a perfect day for a bun! Make a ponytail-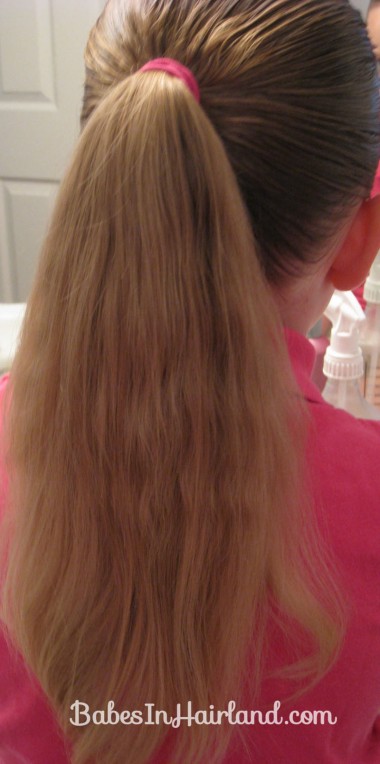
Braid it – twist it – whatever your preference. Braid down as far as you can. Tie off with a rubber band. I pulled my little ends up in the rubber band so I wouldn’t risk having them poke out somewhere.
Wrap around to form your bun. Anchor with a few bobby pins.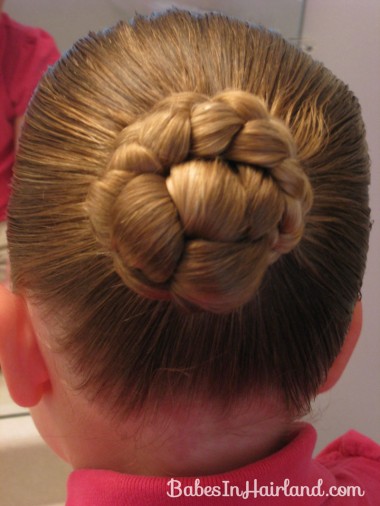
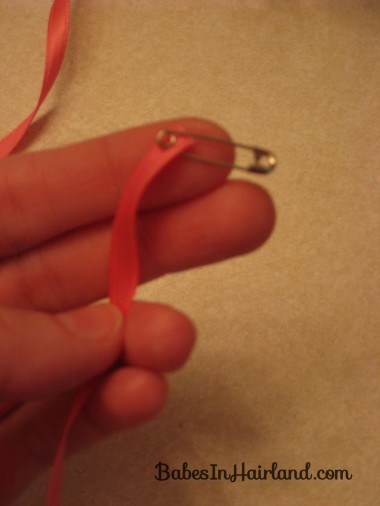
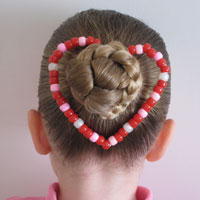
As I did in this post I did back around Valentines Day – I used a safety pin to lace the ribbon through the bun & hair on her head. It’s probably a very good idea to use a safety pin on this due to the fact that you are poking it through the bun and then towards the direction of her head (rather than just lacing back & forth like shoe laces where you probably won’t touch her actual head.)
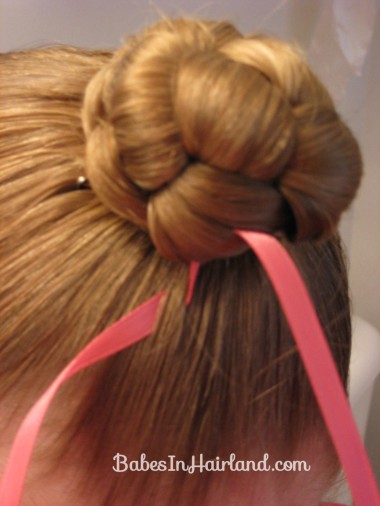
Begin at the base of the bun and start by lacing the ribbon through a small section of the bun – in the direction of her head. Once out of the hair in the bun lace it under a small section of hair on her head as shown below.
Form a loop with the ribbon & then lace the pin & ribbon back up through a small section of the bun again. Then double back & go back towards the head. Hopefully the pictures speak for themselves.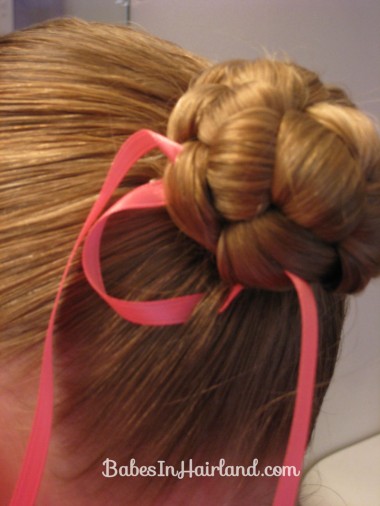
As you do on the first loop/petal, then go under a small section of hair with the ribbon & form another petal or U shape & head back towards the bun. You can make as few or as many of these “petals” as you like around the bun.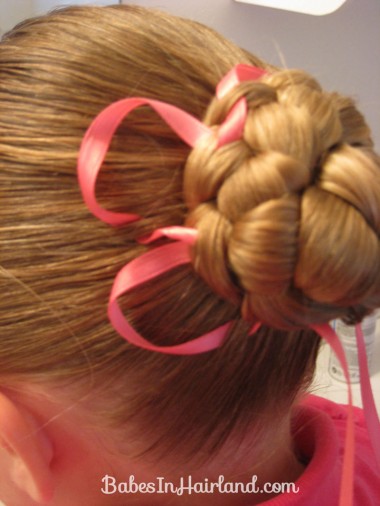
Depending on where you are on the bun, you may have to lace the ribbon through at a little bit different angle – but just mess with it until it looks like you want it to. Then once you’ve reached the under side of the bun again, tie the 2 ends together to form a little bow. Be sure to have plenty of ribbon to work with (I didn’t cut the ribbon off the spool until I was sure I was done & things were even for me.) If your petals are uneven, just tug on them a bit and work the ribbon around to make them even. Once again – every loop is probably not exact but in the end it looked really cute & it stayed all day w/o a problem at all. Just be sure to use a thinner, silkier ribbon. I’ve since tried it with a thicker grosgrain and it didn’t “flow” as easily! Also, no matter how I positioned Bug’s head, I couldn’t get a good straight on shot of this – sorry. Apparently I got the bun a bit off centered. Oh well. Never said I was perfect! 🙂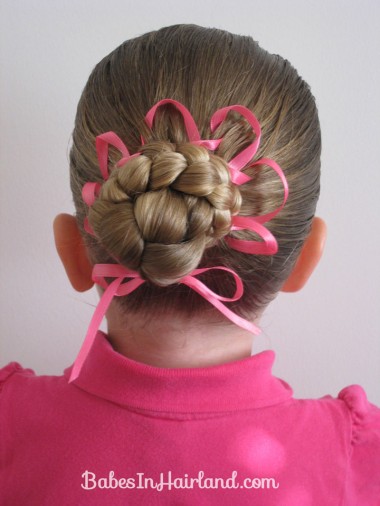
So there you have it – Ta Da! She loved this & so did everyone who saw it!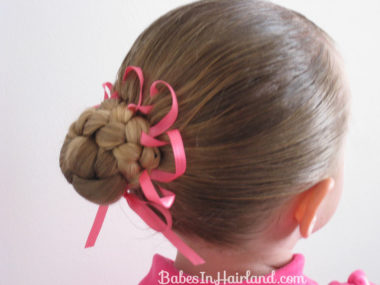
And before I forget to mention it — Through May 1st @ 10p.m. (that’s tomorrow) over at All Things Ribbon EVERYTHING is 25% off. Now, I’ve got to tell you — we bought Goose’s beau-ti-ful Easter dress from their site & I know you’ve seen a bunch of their bows over at Girly Do’s — so if you’ve yet to go check them out — you must. You can’t beat those dresses — and at 25% off … well, need I say more? When you go to check out be sure to enter SPRINGFEVER25 for your discount. Then you can be singing all day for the $$ you saved & then sing all the way back from your mailbox when your wonderful shipment arrives, and your DD will be singing you praises as she has a new fancy twirly dress & with matching bows! So head on over here & check her out!
P.S. Don’t forget about my Monthly Hair Share. Some of you have already sent me your posts – but I’d love to get more to post for May.
