Hope everyone had a wonderful holiday weekend. We got a lot done around here … including painting Bee’s room – which is wonderful! So I can say I had a very productive weekend!
I’ve just first got to say thank you to all of you that took the time to e-mail me or comment on my last post about Bug’s hair. There were some great suggestions and advice offered, so thanks so much! My hair, with each kid got darker and the waves started in back. The flat iron is my best friend most days because of it! Every blue moon I’ll diffuse it and leave it kinda wavy – but I feel like I’m sporting a very dead perm when I do, so I don’t do it very often! I hope if this wave does continue to spread across Bug’s head (that sounds like she’s got some sort of disease — sorry that’s not what’s intended!) that it won’t be the “dead perm” look! Either way – we’ll embrace it and work with it as it comes – in whatever form that might be!! I’m actually kind of excited to see how her hair turns out as she gets older and puberty hits…. just not excited for the hormones of a teenage girl! LOL
Anyway, onto my quick tutorial today. Sorry I don’t have step-by-steps, because it’s only the very end that you probably need instruction on.
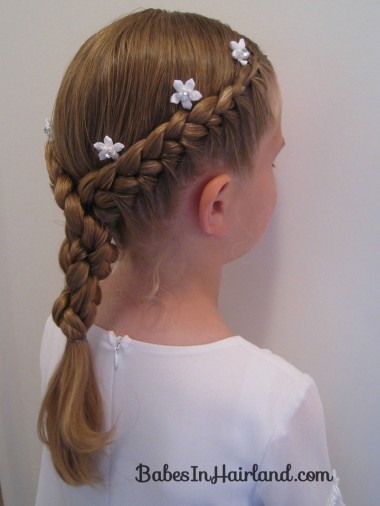
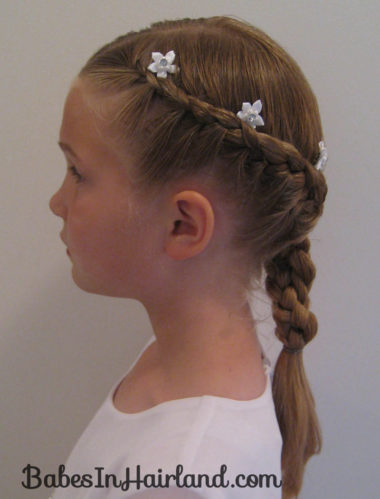
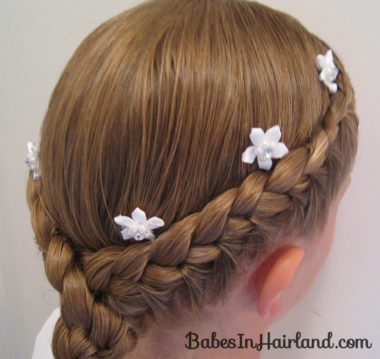
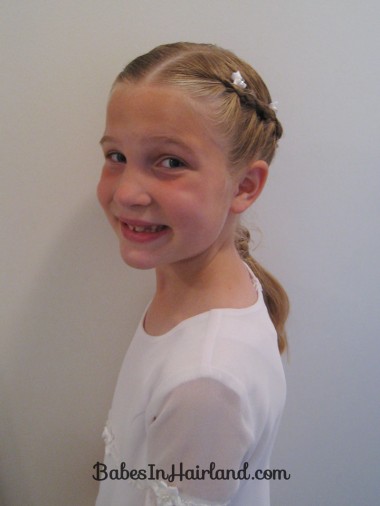
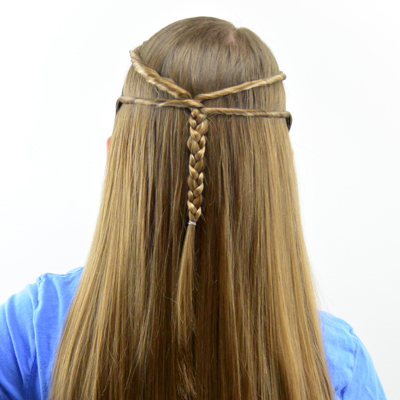
I started by parting the hair off center on the left side of her head. I didn’t part all the way back though. Just on the top of her head. Then proceed to do what I call a half French braid. That’s where you’re adding hair from one side – and in my case, it’s the bottom. Watch my video HERE if you need a reminder on how it’s done. Start by braiding down the right side until you reach the back of the head – towards the middle of the neck. Braid all the way down to the ends of the hair and tie off temporarily so it won’t come undone.
Then on the left side, do the half French braid around the left side of the head until you get to the middle of the back of her head. Braid this section all the way down as far as you can too & tie off.
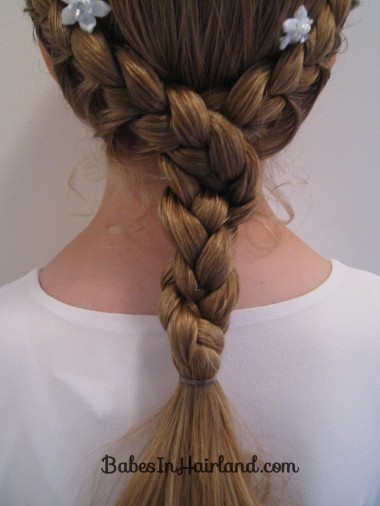
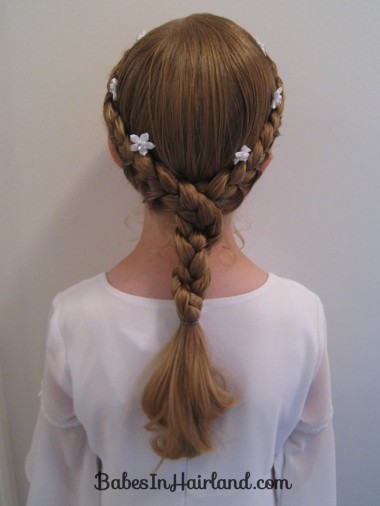
At this point you should have almost 2 “French Braided Pocahontas braids.” Here’s the different way to join these. Take the left side braid & wrap it over the top of the right one – twisting them basically. Twist the 2 braids together until you reach the end of where you braided. Pull out the rubber bands from both braids so you can secure them both together to form one at the bottom. It’ll give you a really pretty twisted braid look.
Depending on your dd’s hair, you may need to add a few bobby pins to keep the left braid crossed nicely over the right one. Or even put a few into the twist itself if you feel like it loosens up a bit or untwists. Add your choice of accessories, and you’re set.
I promise Goose has more than this 1 dress! It just always seems like I’m in the mood to do something extra nice when she wears it! This hairdo would also be great for baptism hair, as it would stay put really well. Anyway, this was just a fun & different way to join your 2 French braids together! Let me know if you have any questions. Have a great day!
P.S. Come back tomorrow for a little something fun I’m starting over the summer called “Just Wondering Wednesday.” It’s your chance to win a little something every week this summer!
Found a winner! Thanks again!
So glad you found one that will work Angenette. Hope all goes well on your dd’s special day!