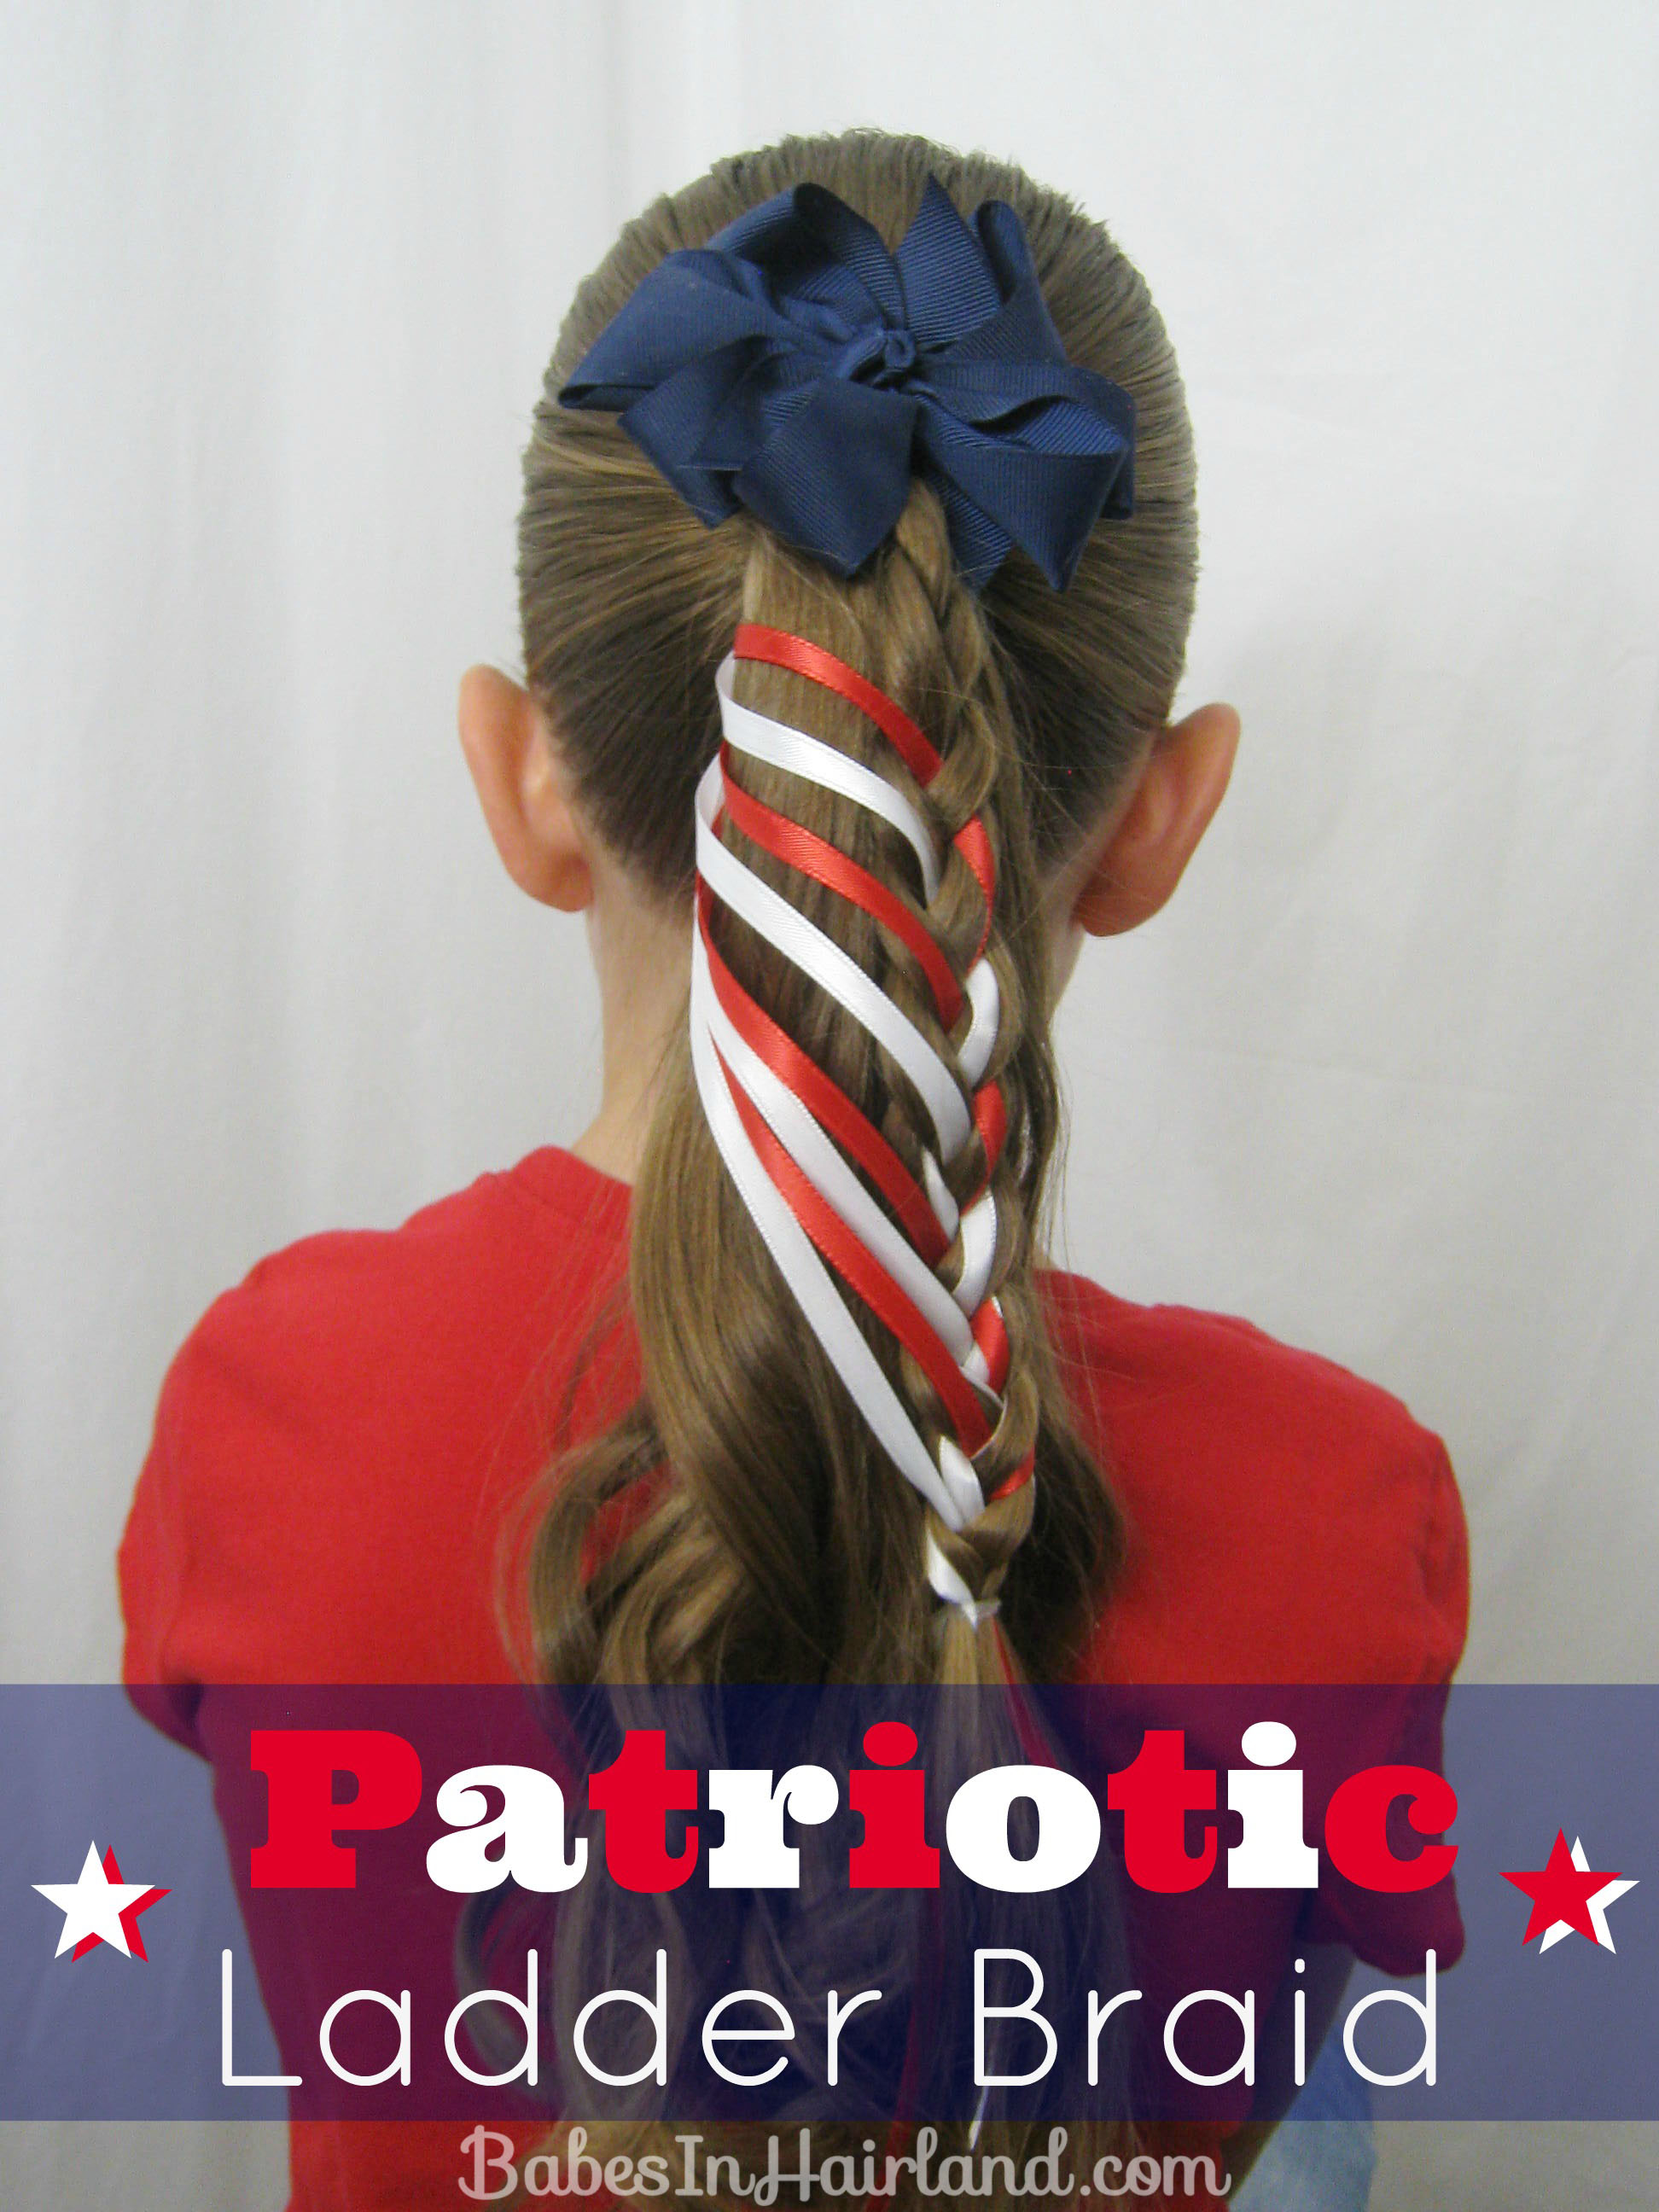
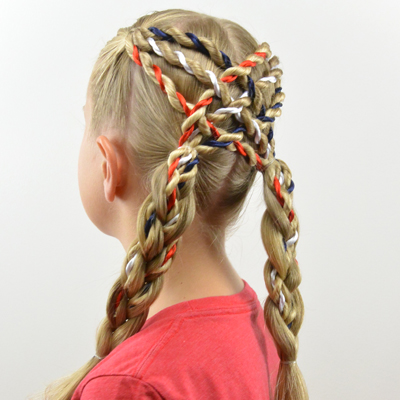
I haven’t been sleeping well lately due to a lot of things, and so of course my brain goes 100 miles an hour when I’d much prefer to be sleeping. This style is one that I started thinking about in the middle of the night recently and wasn’t quite sure if it would work or not. But for a “pulled it out of my hat” kind of style, it turned out kind of cute — and just in time for the 4th of July! You’ll of course need to know how to make a ladder braid & you can watch our Ladder Braid Video if you need a refresher.
You will need red & white ribbon for this and some sort of blue bow or accessory to top off the ponytail. To figure out how many “stripes” I’d needed for this, I did a real ladder braid really quickly and counted the “rungs” (or strips of hair pulled across the pony) and for her 8 turned out to be a pretty good amount. The number will vary based on length of hair and thickness of ribbon that you use.
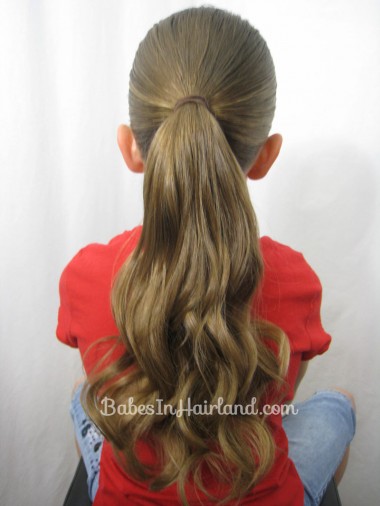
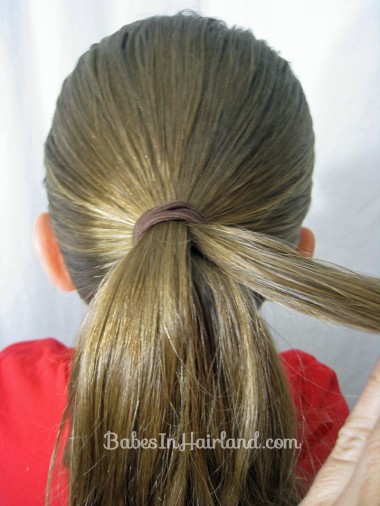
Step 1 – Make a ponytail
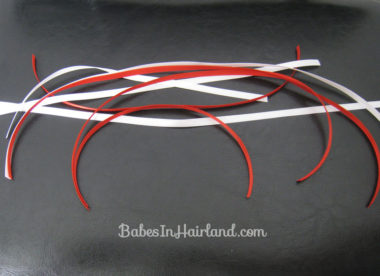
Step 2 – Cut the ribbon
TIP: Here is how I measured for the ribbon: The longest ribbon was about 2 inches longer than the ponytail. I cut one red & one white that long. Then I cut another set of red & white just as long as the pony, and continued to shorten each pair of ribbon by an inch or two. You can probably make them all one length if you want them all trailing out the end evenly or if you’re worried you won’t have enough. I probably could have even made them longer than I did – so don’t skimp on the ribbon length!
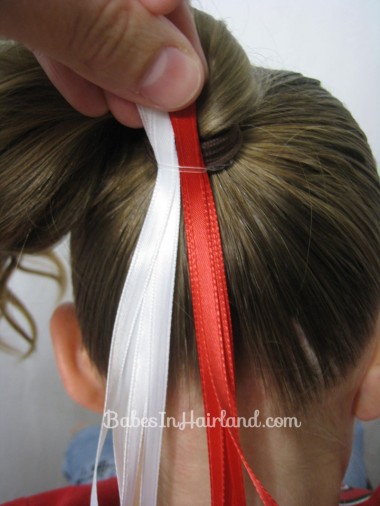
Step 3 – Anchor ribbon
You can put them in any way you like, I just had each color stacked together and pulled them through a clear rubber band underneath the ponytail. Leave enough of a tail that they won’t pull out but not too long that they start peaking out from underneath.
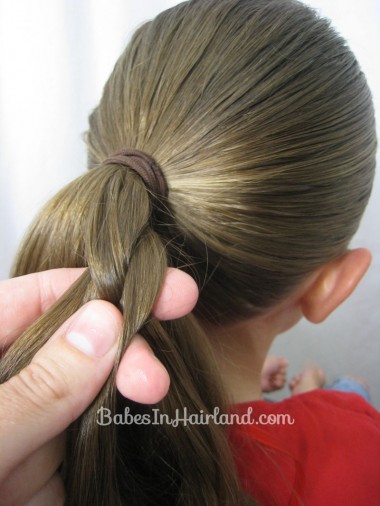
Step 4 – Part out small section of hair
Step 5 – Make 1 plait of your braid
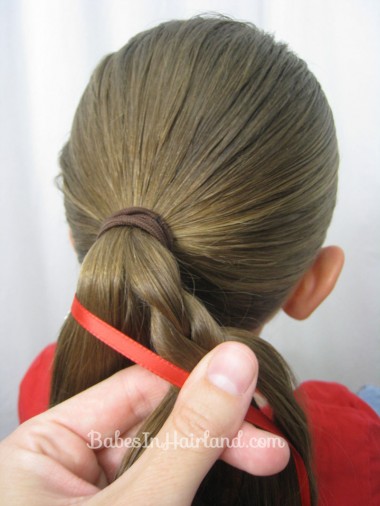
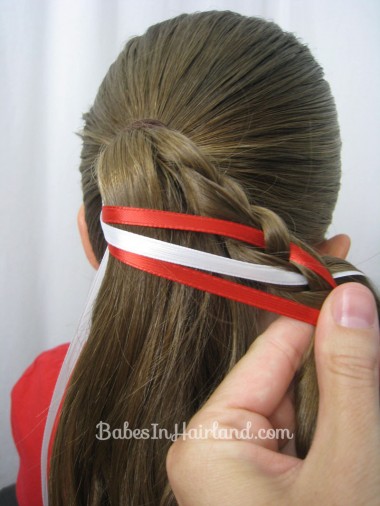
Step 6 – Add ribbon to the braid
Again, if you need a refresher – watch our Ladder Braid video. But instead of adding hair that you’ve grabbed from the under side of the ponytail you’ll only be adding ribbon. Start with the longest ribbons and work your way to the shortest as you work down the braid.
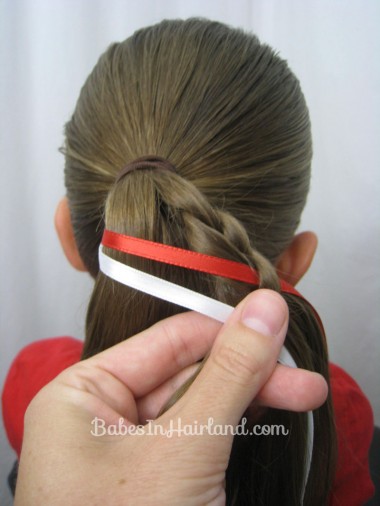
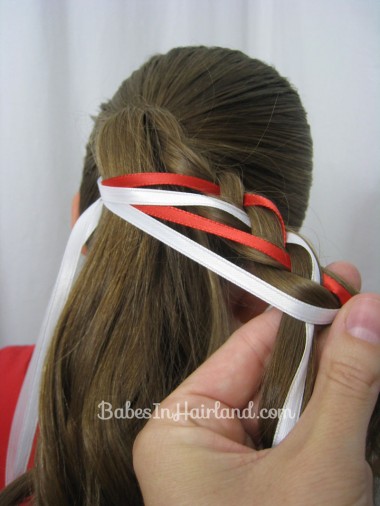
Step 7 – Plait another section and add the other color of ribbon
Step 8 – Continue as above adding ribbon to the braid
Just make sure you are adding a shorter ribbon each time (assuming you didn’t make them all the same length.) Be sure to pull the braid off to the side of the ponytail as we show in the video.
Step 9 – Secure braid
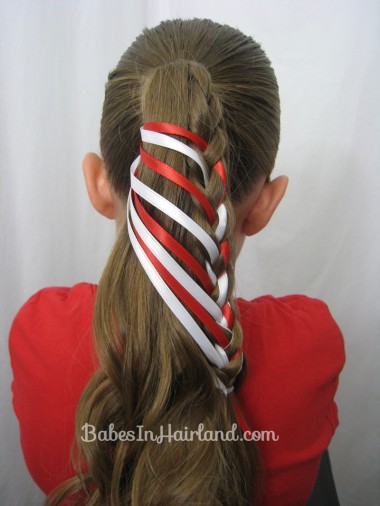
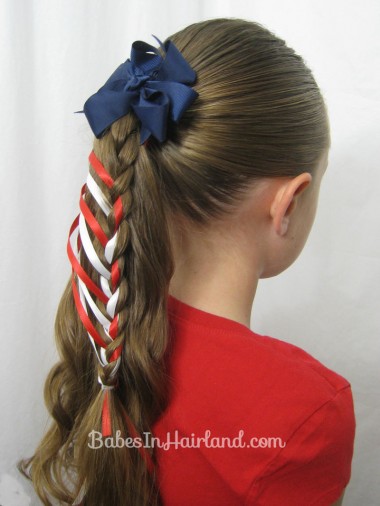
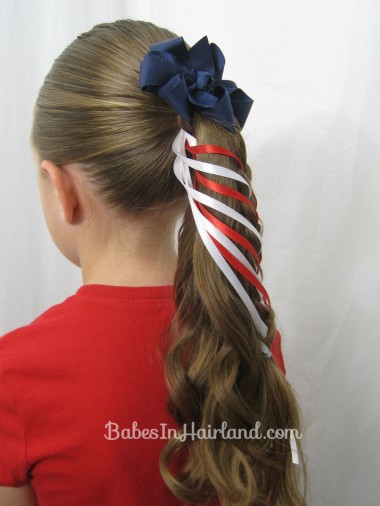
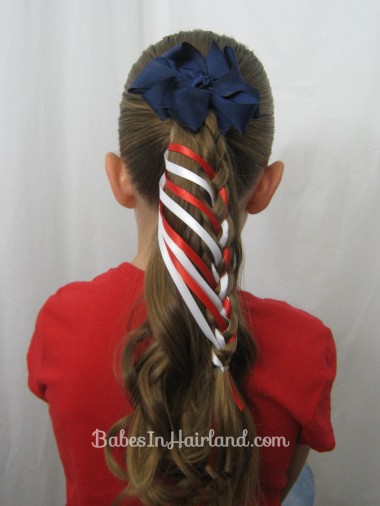
Once you’ve added all your ribbons, secure the end of the braid with a rubber band. You can trim up the ribbons or leave them spraying out below in the ponytail.
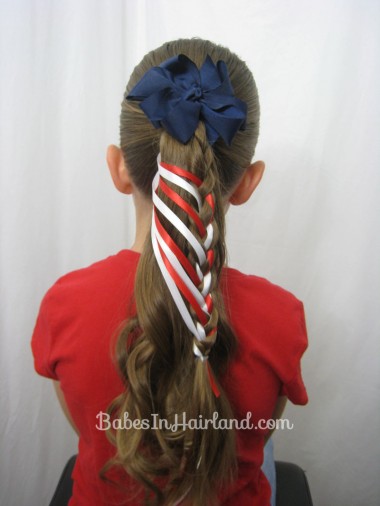
Step 10 – Add a blue accessory on top of the ponytail
Now that I’ve done this once, I probably would have added ribbon at the very beginning and not done a plain plait first. Then there wouldn’t be the gap between the bow & where the ribbon starts.
FINISHED!
So will you be doing any fun & festive hairstyles for the 4th of July? Be sure to check out our roundup we recently posted for all our other 4th of July hairstyles, as well as some fun accessories you can make or buy. Click HERE to go to our 4th of July Roundup.
Be sure to share if you like this or try it! And don’t forget to subscribe through one of the many ways we shared in THIS POST since Google Reader is now dead and you can’t get our latest updates that way any longer! We don’t want you to miss out on anything!

Awesome look, will definitely try it next Thursday on Princess M. And I am following you on Bloglovin; so I am definitely NOT missing any of the fun!!!!! xoxoxo
I’m gonna try this!!
All the hair blogs that I follow are American, no Canadian hairstyles for Canada Day (which also happens to be my birthday) 🙁
Sorry – but I really have no idea how I’d make a Canadian flag in my girl’s hair. What can I say? I’m American, so I’m more apt to do stuff related to the USA. 🙂 I did post yesterday on our FB page a style for Canada Day that just has red & white accessories in it. And really, a lot of the styles you’ve seen for our Independence Day can be adapted by just taking the blue out of the equation & you’re good to go! I’d welcome a hairstyle from you for Canada Day & I’d love to share it or try it out. I think making a maple leaf might be kind of hard though 😉 Sorry to disappoint.
LOVE IT!! that will look great on my little Sofia but her hair is too short now, anyway it will grow soon 🙂
http://www.vindiebaby.com
Vintage Inspired Girls
Oh my! Her hair is so long now!